• Skip to primary navigation
  • Skip to main content
  • Skip to primary sidebar
  • Get A Quote
  • 610.743.5602
  • Schedule A Meeting
default-logo
Menu
  • About
    • Team
    • Careers
    • Work
  • HubSpot Agency
    • Marketing Hub
      • Setup & Strategy
        • Inbound Success Plan
        • Inbound Marketing Plans
      • Traffic Generation
      • Lead Conversion
      • Lead Nurturing
    • Sales Hub
      • CRM Implementation
      • Sales Enablement
      • Sales & Marketing Alignment
    • Content Hub
  • Digital Marketing
    • Inbound Marketing
      • Inbound Marketing Plans
    • Content Marketing
    • Email Marketing
    • SEO
    • Social Media Marketing
    • PPC Management
  • Digital Analytics
  • Web Design
    • Shopify Web Design
    • CMS Hub
    • Branding/Graphic Design
    • Our Work
    • Hosting & Maintenance
  • Blog
    • Small & Mid-Sized Business Resources
    • Client Referral Program

api

Google Analytics API – Lesson 4: Authentication

October 16, 2013 by Dabrian Marketing Group Leave a Comment

Google Analytics API – Lesson 4: Authentication

If you’ve been with us through the entire series, welcome back! This time we’ll get in and get our hands dirty in some code. If you haven’t been with us for the series, start by reading the first part of the series, which discusses some background, and the second part of the series. We also have added the third part of the series which prefaces today’s lesson.

Picking Up Where We Left Off

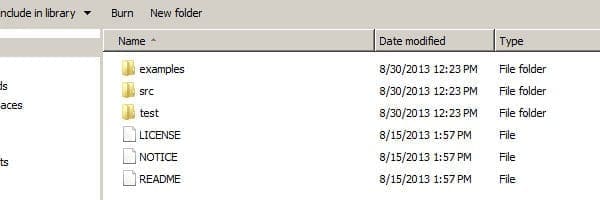
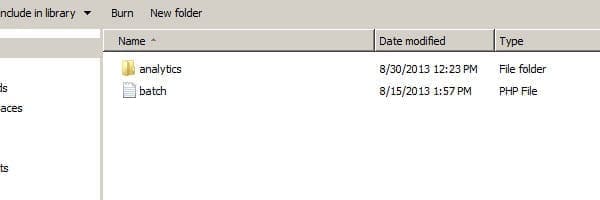
The next step in the process is to start editing and uploading the files. Before we begin editing files, we must first get the information to place in the files. This part is mainly Google’s authentication.

Well, How Does the Authorization Work?

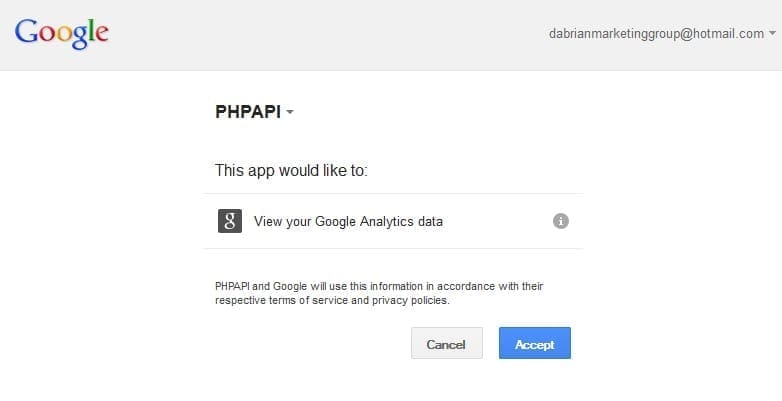
Google uses Auth 2.0 with a special token to authenticate a user. If you have ever allowed an app to access your Google information, this is the same process. When you use a Google app, which is what we will be developing, it will first request access by you. This will require a Google login from the account you wish to use the app with. Then, it will ask for your permission for the app to access your account. Finally, it will return an authorization token to the application. This token has an expiration. It also may expire early depending on your browser settings.

Where do I go to Authorize?

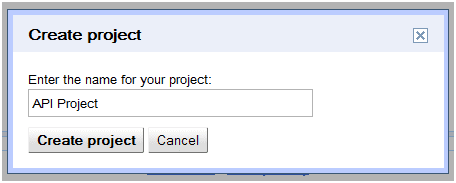
To get your information for authorization, head over to the Google API Console. When in the console and logged into the appropriate account, click the dropdown in the upper left hand corner to create a new project. Name the project any name you choose.

API Project

Once you have created a project, navigate to the services page. Ensure that you turn on the Analytics API. Once you have completed that, click the ‘API Access’. This will take you to an area where you can generate the keys you will need.

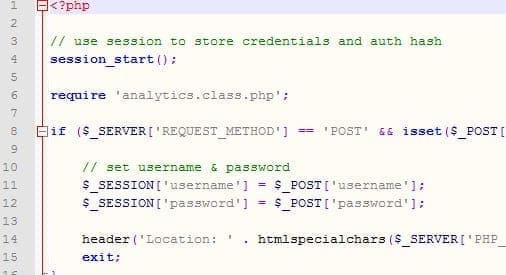
For our purposes, we’re going to be doing a web application. We are still working in PHP for this project. All of the demonstrations will be live and on the web. Input the appropriate information here.
After you have submitted the client ID settings, you’re done! You will be redirected to the API access page, where you can see all of the information.
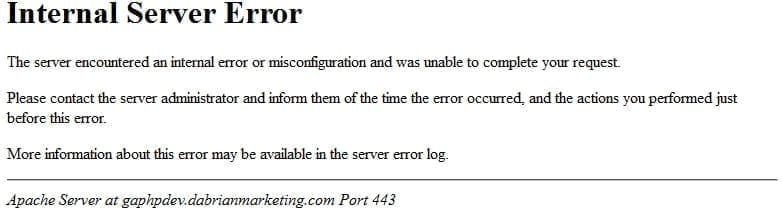
What if it breaks!?

Luckily, you can’t exactly break this one. However, as we move forward with more coding, you will need to keep an eye on these settings. There are some errors that you may run into that could be caused by the settings you made here.
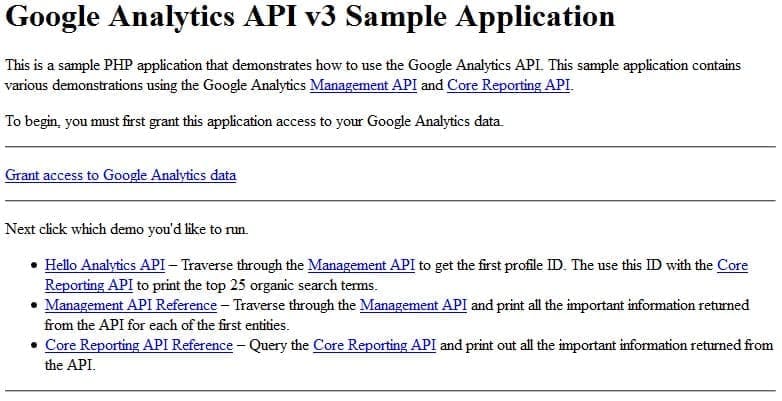
For the next installment, we will be discussing how to actually implement these items into the previously downloaded code. From there, we will move forward with uploading and testing the application!

Have more questions about starting with the Analytics API? Tell us in the comments, and stay tuned for the next part of the series!

Filed Under: Google Analytics, Web Design Tagged With: api, Google Analytics

Google Analytics API – Lesson 3: Starting to Code

September 5, 2013 by Dabrian Marketing Group Leave a Comment

If you’ve been with us through the entire series, welcome back!  This time we’ll get in and get our hands dirty in some code.  If you haven’t been with us for the series, start by reading the first part of the series, which discusses some background, and the second part of the series, which provides a high level overview of the steps we will be taking today.

Let’s Start at the Very Beginning…

The last installment in this series will look markedly similar to this session.  However, throughout the next few posts I intend to reference code samples and actually guide you through the step-by-step process from my perspective.  The goal is that you should be able to follow these instructions as a supplementation to Google’s already thorough instructions.

Since my final goal is to query specific metrics from Google and eventually move them to a database, I chose to complete this process in PHP.  This way, I can easily interface with a MySQL database.  PHP may not be the best language for the process that you are trying to complete.  For this reason, Google also provides several other languages.  This guide still may be useful in understanding overall how the process works, for those of you who may prefer Java or Ruby.

…A Very Good Place to Start

The first step, if you have not yet completed it, is to read the first two blog posts in this series.  This will give you the background necessary to understand the process that I am going to follow.

In the last post, I mentioned the code libraries and the Hello Analytics API tutorial.  The first step for this process will be to download the proper files.  The PHP library can be accessed here. 

The download area looks like this:

Google Client Library

Once you have reached this page, click to download the latest release file.  The file will be in a tar.gz format.  Use a file manager such as WinZip or 7Zip to extract the .tar file to your desktop or other convenient location.

Open the containing folder.  Within this folder, there will be several more directories.

It should look like this:

File Structure One

License, notice, and readme are all files necessary for legal purposes.  You will not need to access these files for this tutorial.  The other three folders are of the most interest.

Open “examples”.  Once you have done that, you will see a lengthy list of a multitude of examples.  To keep things simple, I recommend that you delete all of the folders and files except for the analytics folder and the batch text file.

When that is complete, it should look like this:

File Structure Two

Once that is complete, you will free up some more space and make the files easier to work with.

Now your files are prepared for the process.

Understanding the Files and Process

Within this analytics folder is the actual code that will run and display in your browser.  In addition to this folder, the “src” folder at the high level holds the code that runs in the background.  This code will ensure that you are authenticating properly.

In its simplest terms, the whole process works as follows:

Visit test site -> click link to authenticate -> allow application authentication via Google -> return to your original page with an auth token -> complete any more processes in your application.

Preparing for the Next Session

Now that all of the files are downloaded, you will need to prepare for the next post.  In the next few posts, we will be editing and configuring code, getting this code on to our server, and running the code.

You will need the following programs to complete the next section:

A text editor such as Notepad++ or Notepad.
A FTP client such as FileZilla.
A live webserver.  If a live webserver is out of the question, those of you who are comfortable with some development may be familiar with a locally hosted server such as WAMP, MAMP for Mac, or XAMPP.

I completed this testing on a protected subfolder of a live domain.  If you do not have a testing environment that is live to work with one of the AMP programs will suffice.  If you do have a live environment to work with, this is when you can edit or set up a new directory to work with.  Either that, or install and configure your FTP client to work with your server.

In addition to having the proper software setup, you should familiarize yourself with the files in the analytics folder, such as the Hello Analytics file or the authorization files.  Once downloading and installing the text editor, open the files and browse through them.

At this point, if you have not already done so, you will need to create a Google account.  Once that has been completed, you are now ready to begin development.  We’ll see you at the next tutorial!

Stay tuned for the next part of the series where we will begin to edit and understand the code!  Questions?  Comments? Post them below!

Filed Under: Google Analytics, Web Design Tagged With: api, Google Analytics

Google Analytics API – Lesson 2: Resources

July 17, 2013 by Dabrian Marketing Group 1 Comment

The second part of this series will outline exactly where to begin when working with the Google Analytics API. Google provides all of their code and a lot of information, which can be quite overwhelming. Throughout this post, I will break down the necessary resources and next steps to begin programming with the API. If you haven’t checked it out yet, head over to the first part of the series for some background before continuing.

Where do I start?

Fortunately for those of us who are new to the idea of programming with an API, Google provides a Hello Analytics API tutorial. This tutorial allows you to select from four languages: Python, Java, JavaScript, and PHP. If none of these languages work for you, you’re welcome to follow the tutorial and use one of the beta languages available.

This tutorial will explain how to download and install the client libraries, use the API console to create OAuth 2.0 tokens, and give code samples. Full code samples are available in their respective Google code libraries and code snippets are available in various tutorials to get you started. These code snippets provide information about exactly what each piece of code is doing and explains how it works. In time, when working with the code, you will be able to understand and edit it appropriately to create new and interesting applications based on the API.

In addition to the analytics tutorials, it may be beneficial to set up a development environment. This information can be accessed by doing a simple Google search for the language that you prefer. In addition, it will allow you to better read and synthesize code.

What’s next?

After reviewing the documentation and setting up with the Hello Analytics API tutorial, it may be useful to download some code samples and begin to review them. If you choose to do so, you can also run these programs or upload them to a server depending on which language you have decided to use.

PHP Code

One important item to note is that you must edit your files to include the correct OAuth 2.0 information, which you receive from following the Hello Analytics API tutorial. Items such as the client ID and URI will need to be added in the configuration file that you have downloaded. Most of the code libraries provide information or documentation on where to make these changes. If the information is not in the code library, it will be provided in the comments section accompanying the file.

Sample Application

What should happen?

When your libraries are downloaded and you run the files, the first key item that should occur is for the OAuth 2.0 to activate. This will either launch your browser or launch another window in your browser with a Google popup asking if the application is permitted to use your account information. You should then allow access.

PHP API

If this occurs successfully, you may then use the other code snippets to query data from the Google Analytics servers.
Please keep in mind that the data from these code samples will not be pretty. It may use some basic formatting, but it will most likely output in a very simple format. Further styling and programming may be necessary to have the data appear in a certain way.

What if it breaks!?

The code breaking is always a very real possibility. I am hard pressed to think of a situation in which my code actually worked perfectly on the first try. In one instance I used PHP as my desired language. After uploading the code, I was able to authorize the attachment of the application to my Google account. However, once the authorization would finish, I would immediately receive a server error.

500 Server Error

When something like this occurs, usually you receive an error stating which line the error is occurring on. This all depends on the language that is being used. For PHP, it presents the line error right in the browser.

If you run into errors and are not able to resolve them by reviewing the code, there are many resources that are available to use. The first option is to complete a search with the information or the error in it. This often yields results from a number of other people running in to the same problem. If you are unable to find your problem by conducting a search, there are other options. Stack Overflow, Google Developers Forum, and some subReddits such as /r/learnprogramming are all valid resources where other developers are available to answer questions.

Have more questions about starting with the Analytics API? Tell us in the comments, and stay tuned for the next part of the series!

Filed Under: Google Analytics, Web Design Tagged With: api, Google Analytics

Primary Sidebar

Archives

Categories

Subscribe Now


CONTACT INFORMATION

DaBrian Marketing Group
3535 N. 5th Street HWY
Suite 2, #203
Reading, PA, 19605

  • 610.743.5602
  • Mon - Fri: 9AM - 5PM
Contact Us
Web Support

RESOURCES

  • Case Studies
  • White Papers
  • eBooks
  • Small Business Resources
  • Our Blog

MARKETING

  • Financial Services
  • Health & Wellness
  • Ecommerce & Retail
  • Business 2 Business
  • Business 2 Consumer

VISIT OUR LOCATION

  • Get Map & Directions

CONNECT WITH US

Facebook Instagram Linkedin Rss Twitter Youtube

Copyright © 2025 DaBrian Marketing Group  •  All Rights Reserved  •  Privacy Policy

Scroll Up